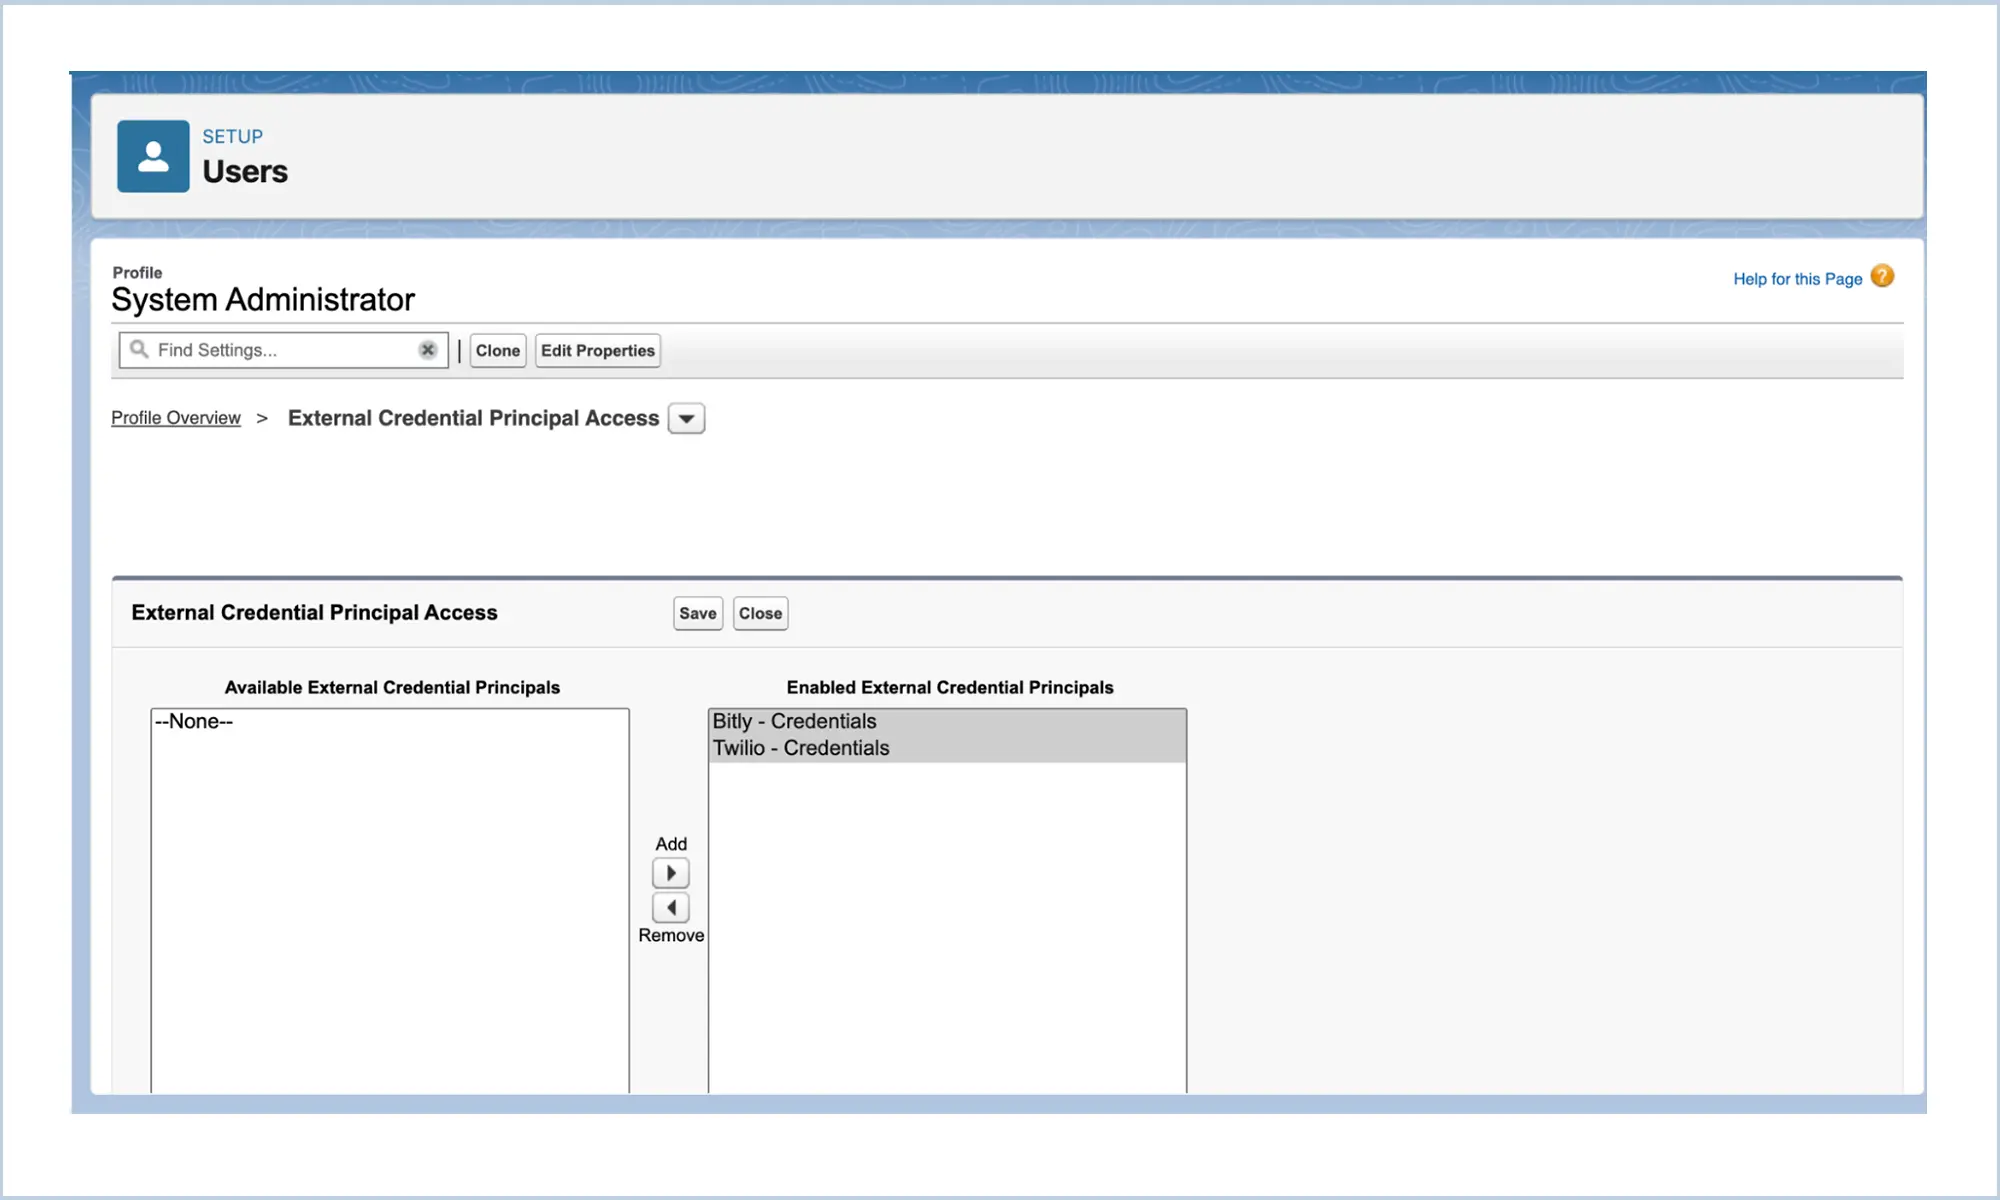
Create Principal in both the external credentials. Select Named Principal as Identity Type

WatBox-SMS : Post Deployment
Configuration Guide
Follow these steps to ensure your SMS integration works smoothly with Twilio and Salesforce.
Post Deployment Step 1 :
Create Named and External credentials for Twilio & Bitly. Provide access to External Credential Principal to the respective profiles.
External Credentials Principal :
| External Credential | Username | Password |
|---|---|---|
| Bitly | Email ID | Password |
| Twilio | Account SID | Auth Token |
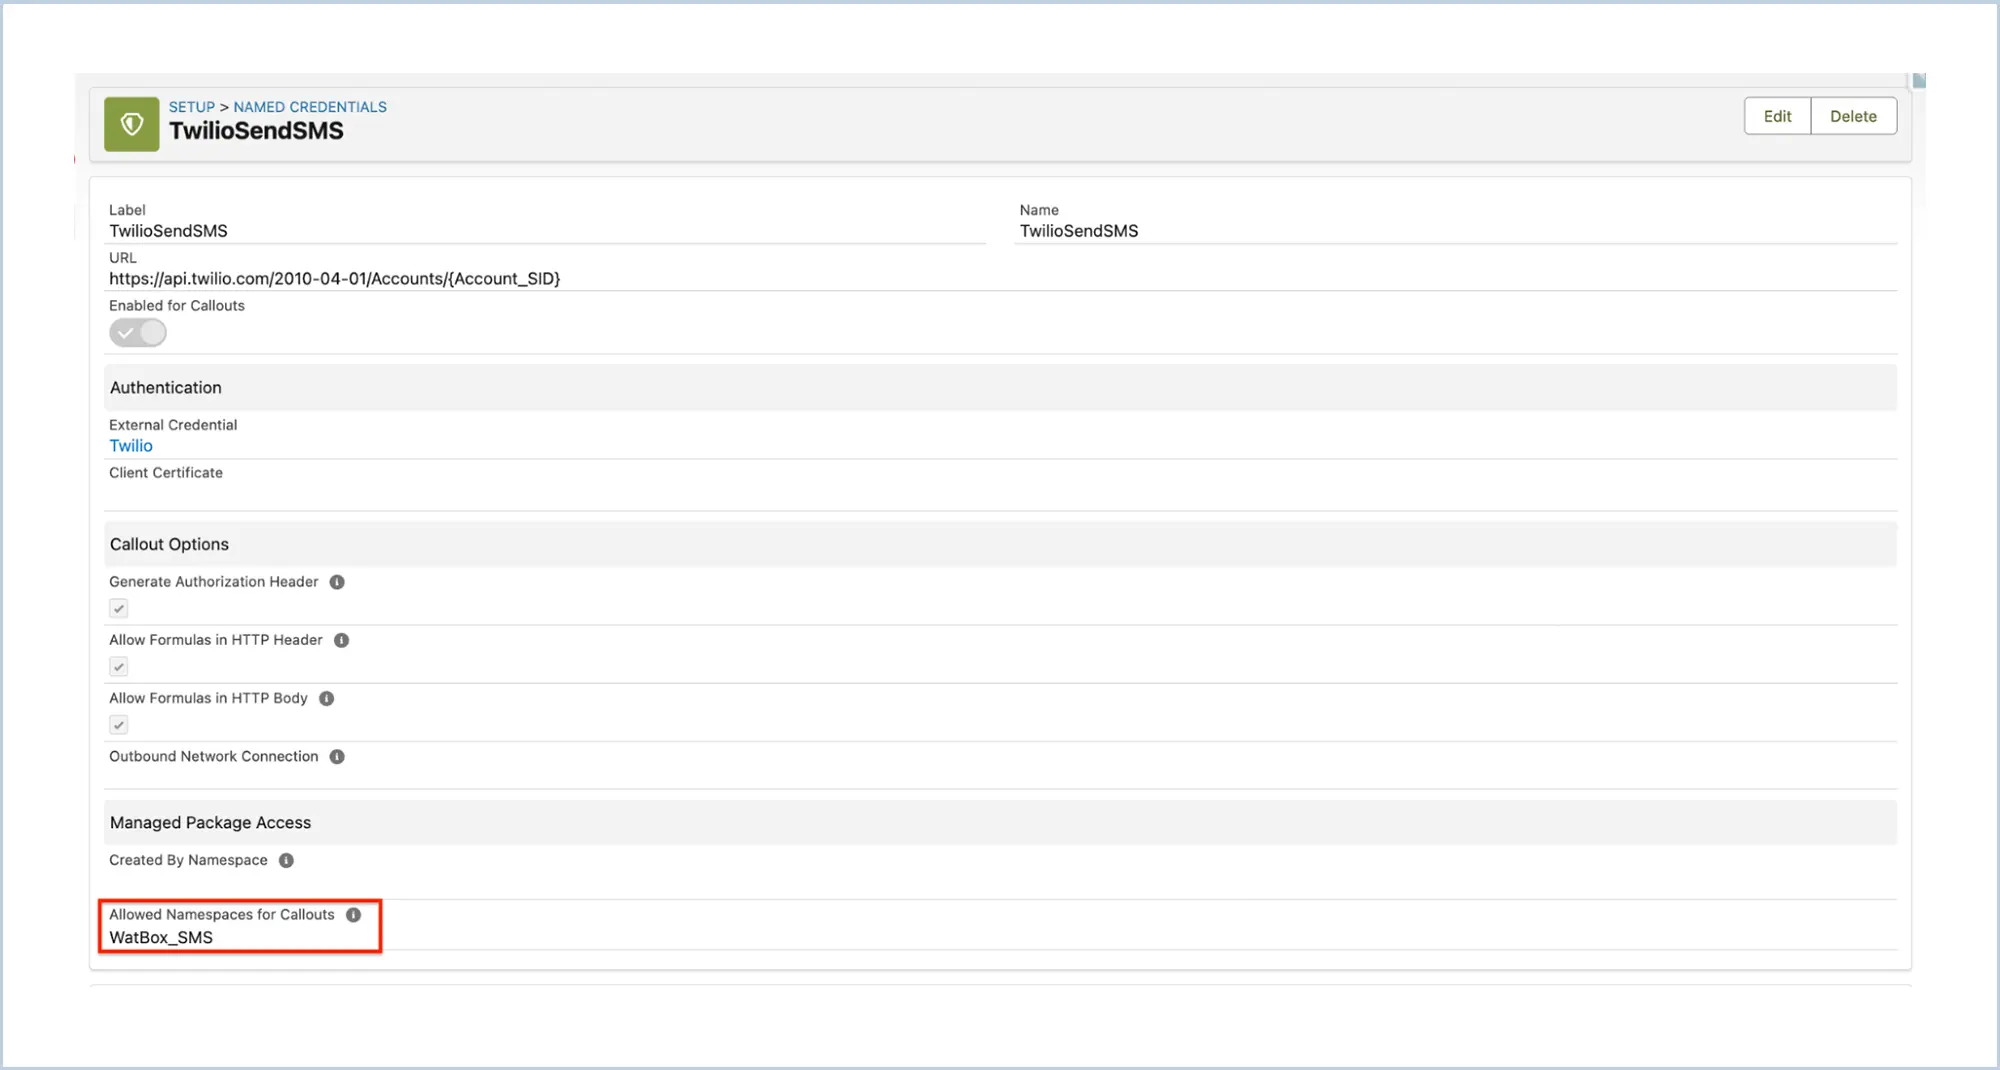
NOTE : In Allowed Namespaces for Callouts field in named credentials provide value as WatBox_SMS. In the Bitly account make sure at least a group is there.


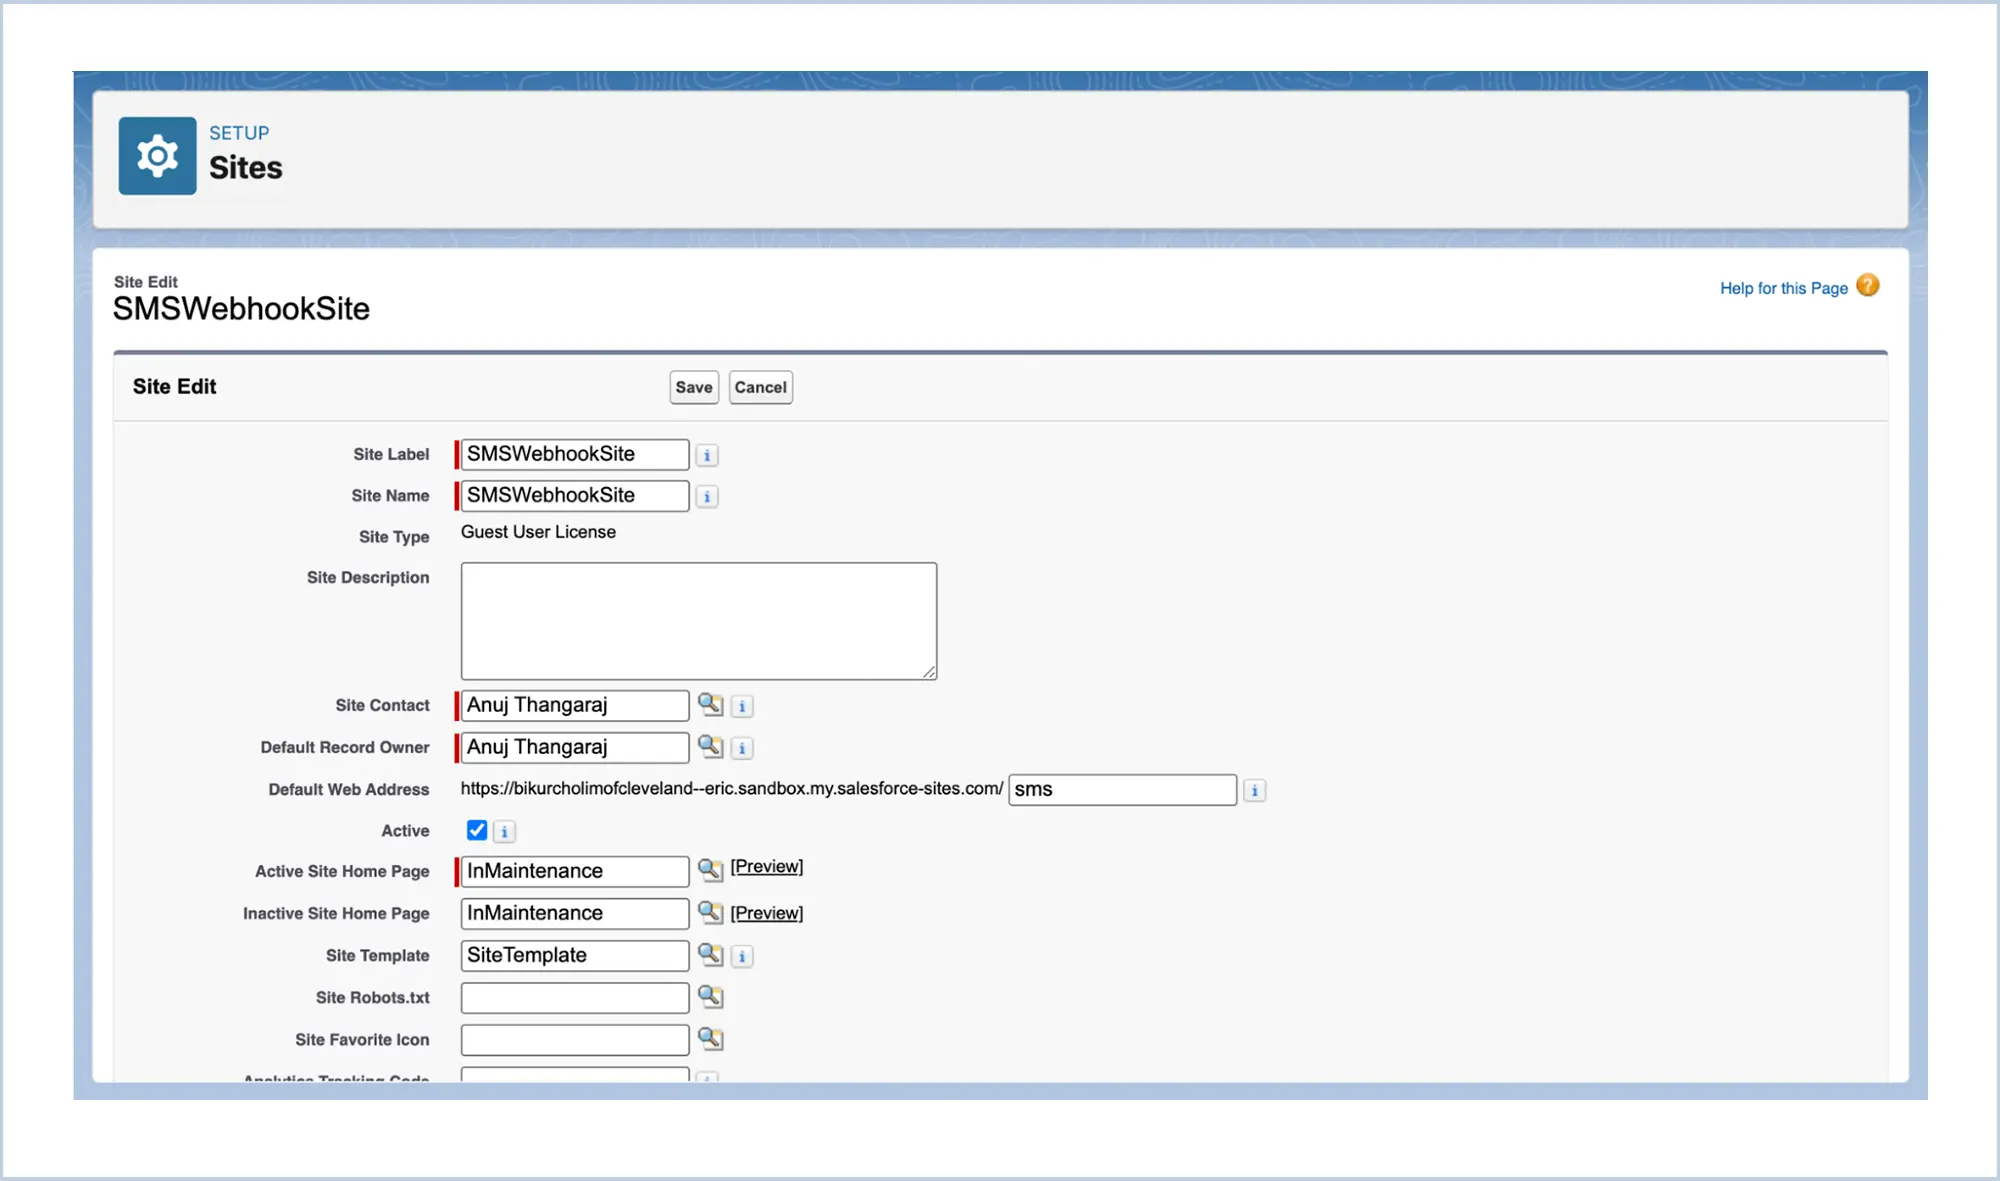
Post Deployment Step 2 :
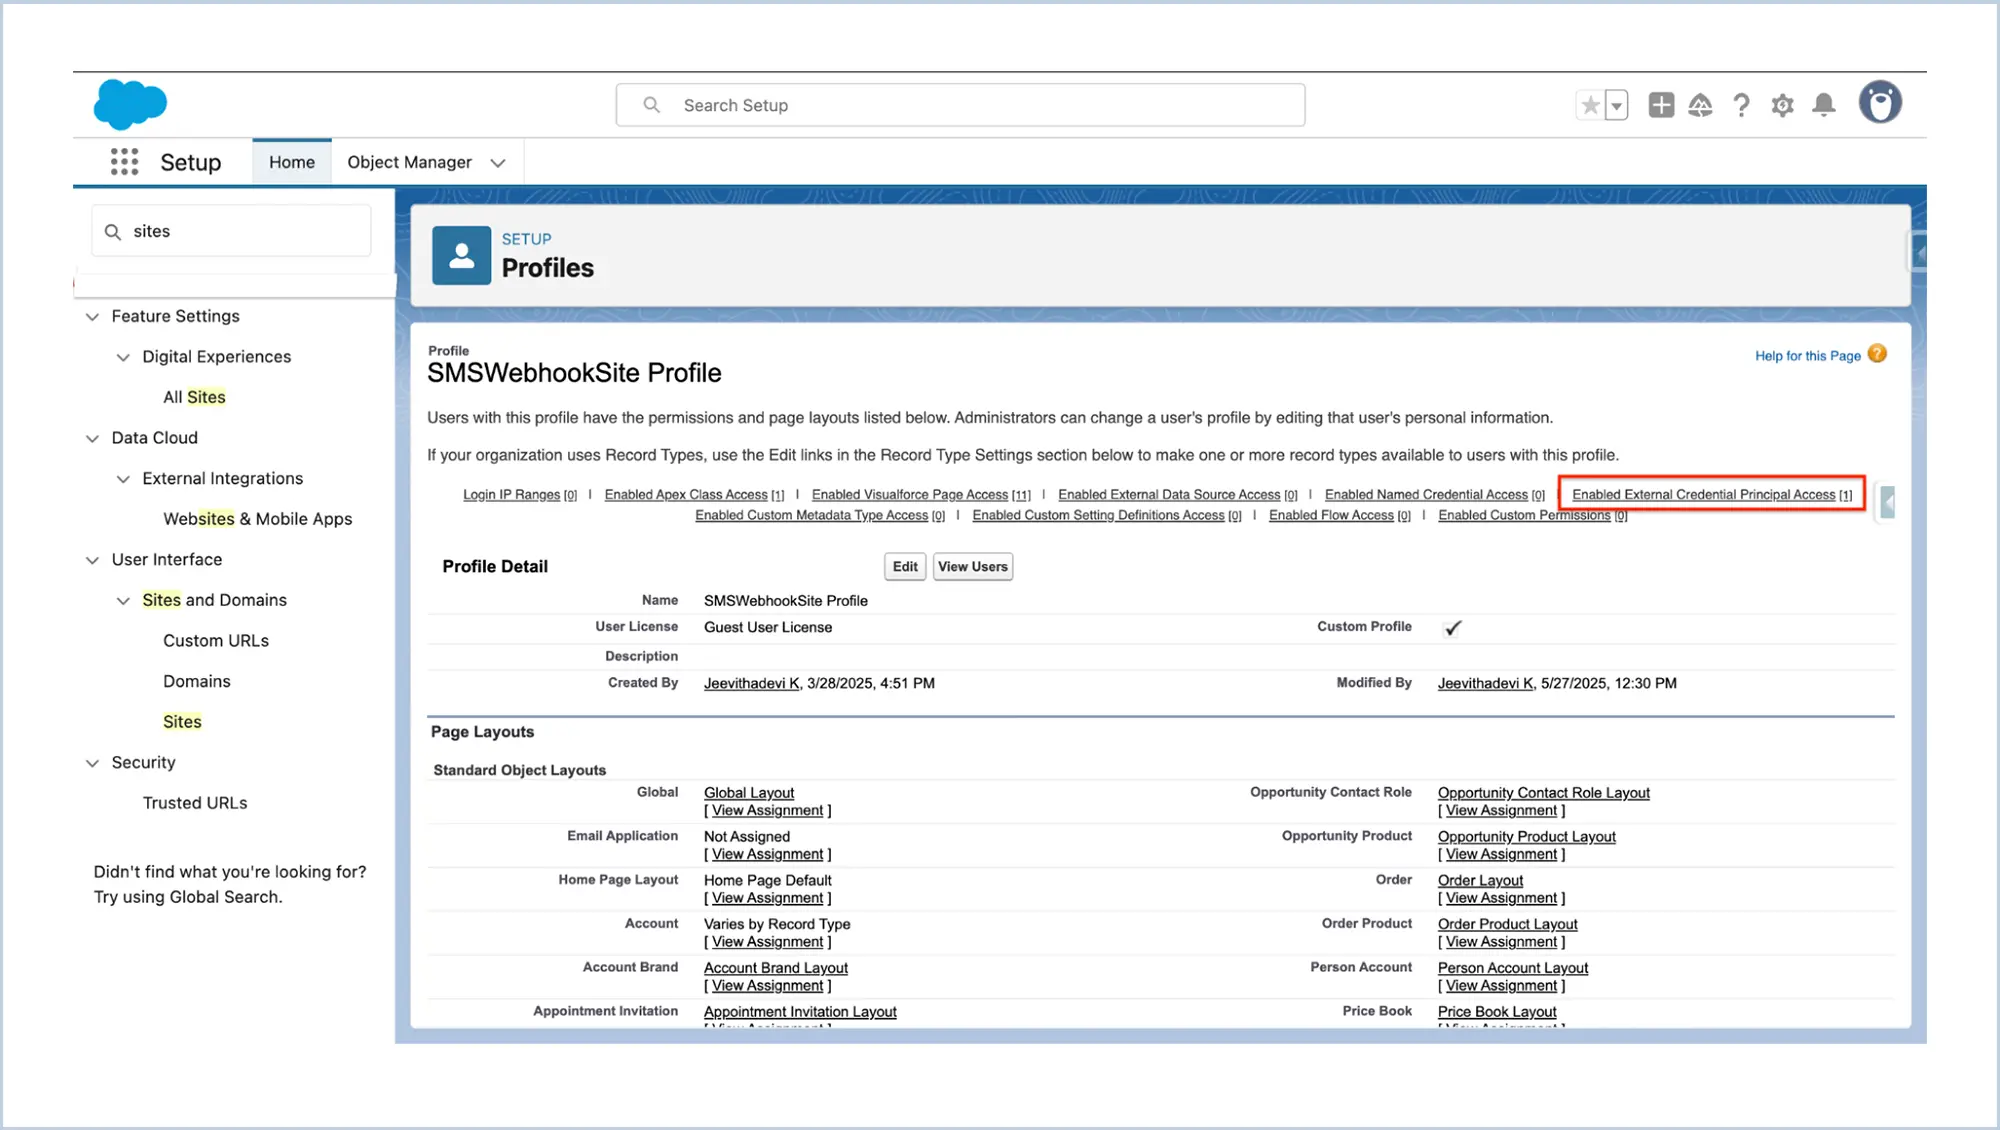
Create a site named SMSWebhookSite with Url Path Suffix. Provide following access.
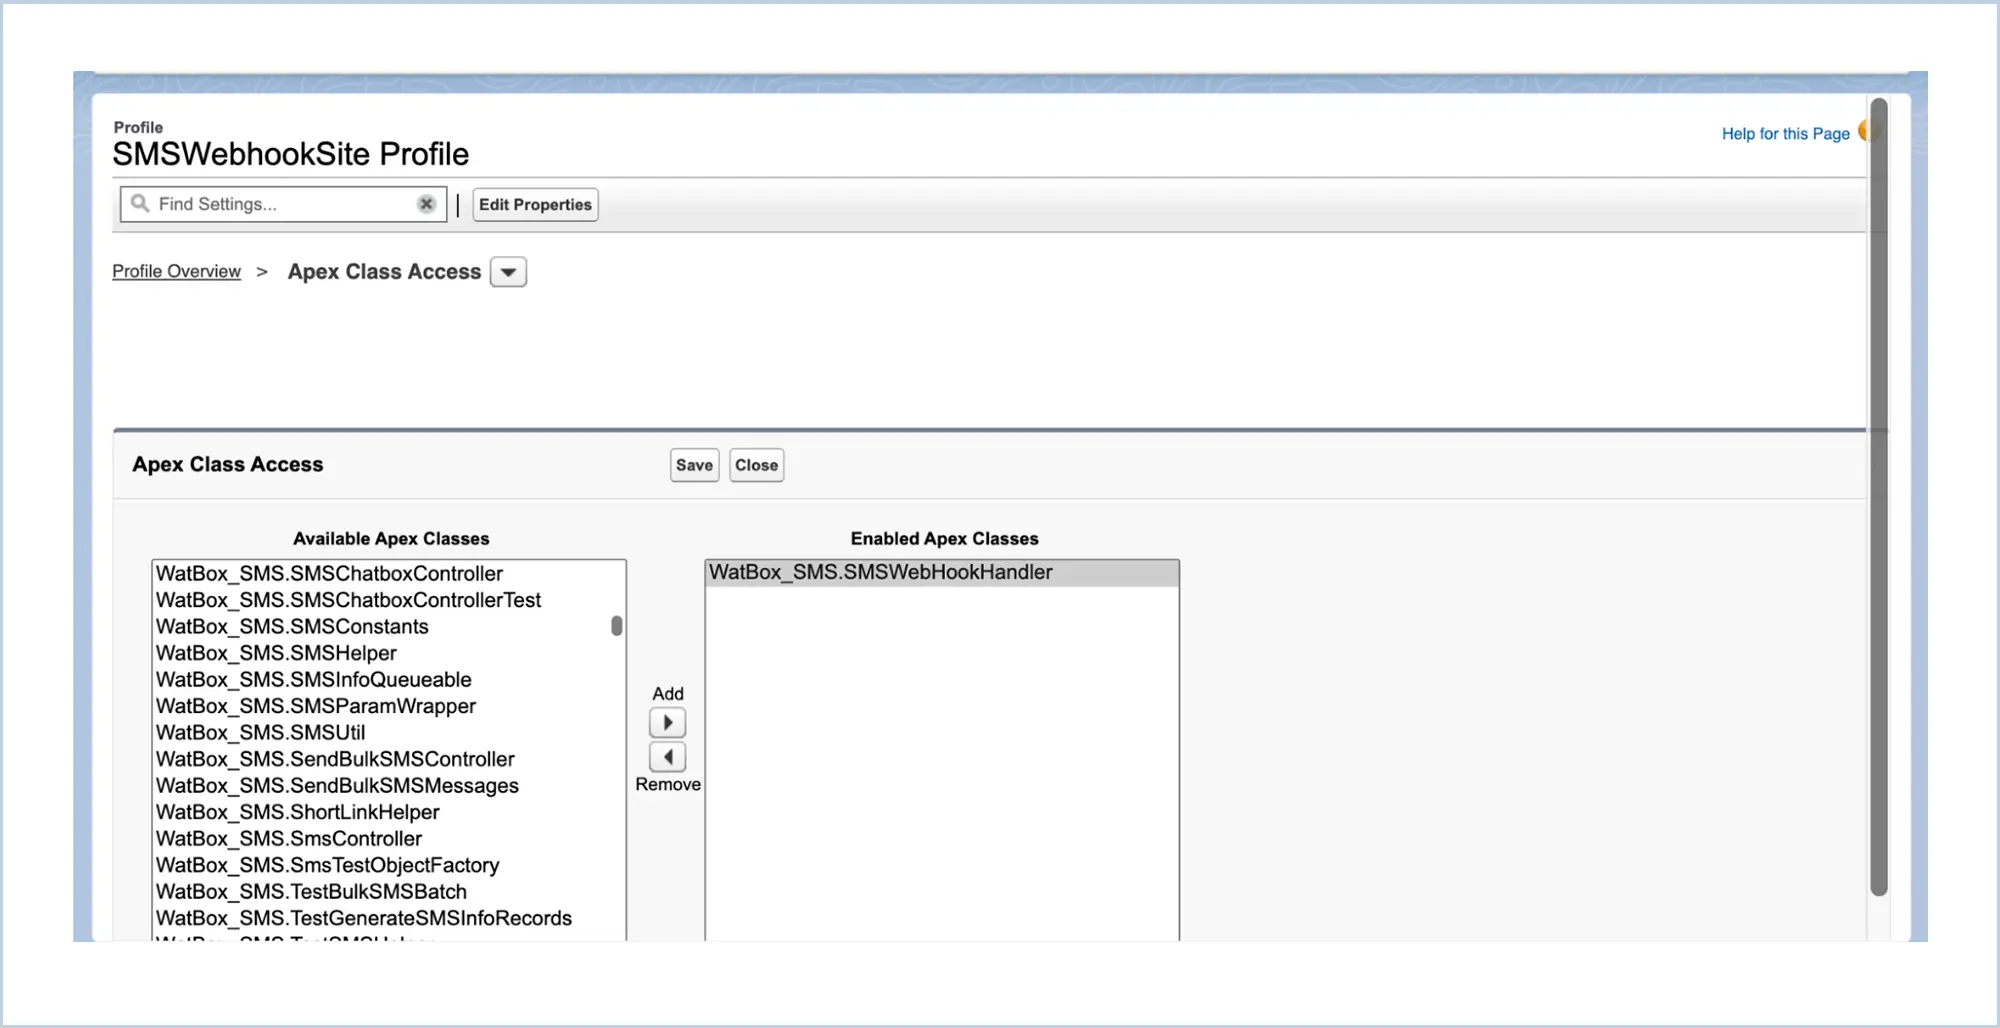
-
Access to the SMSWebhookHandler class
-
Twilio External credential Principle access.
-
Read and View All Fields access to User External Credentials object

Post Deployment Step 3 :
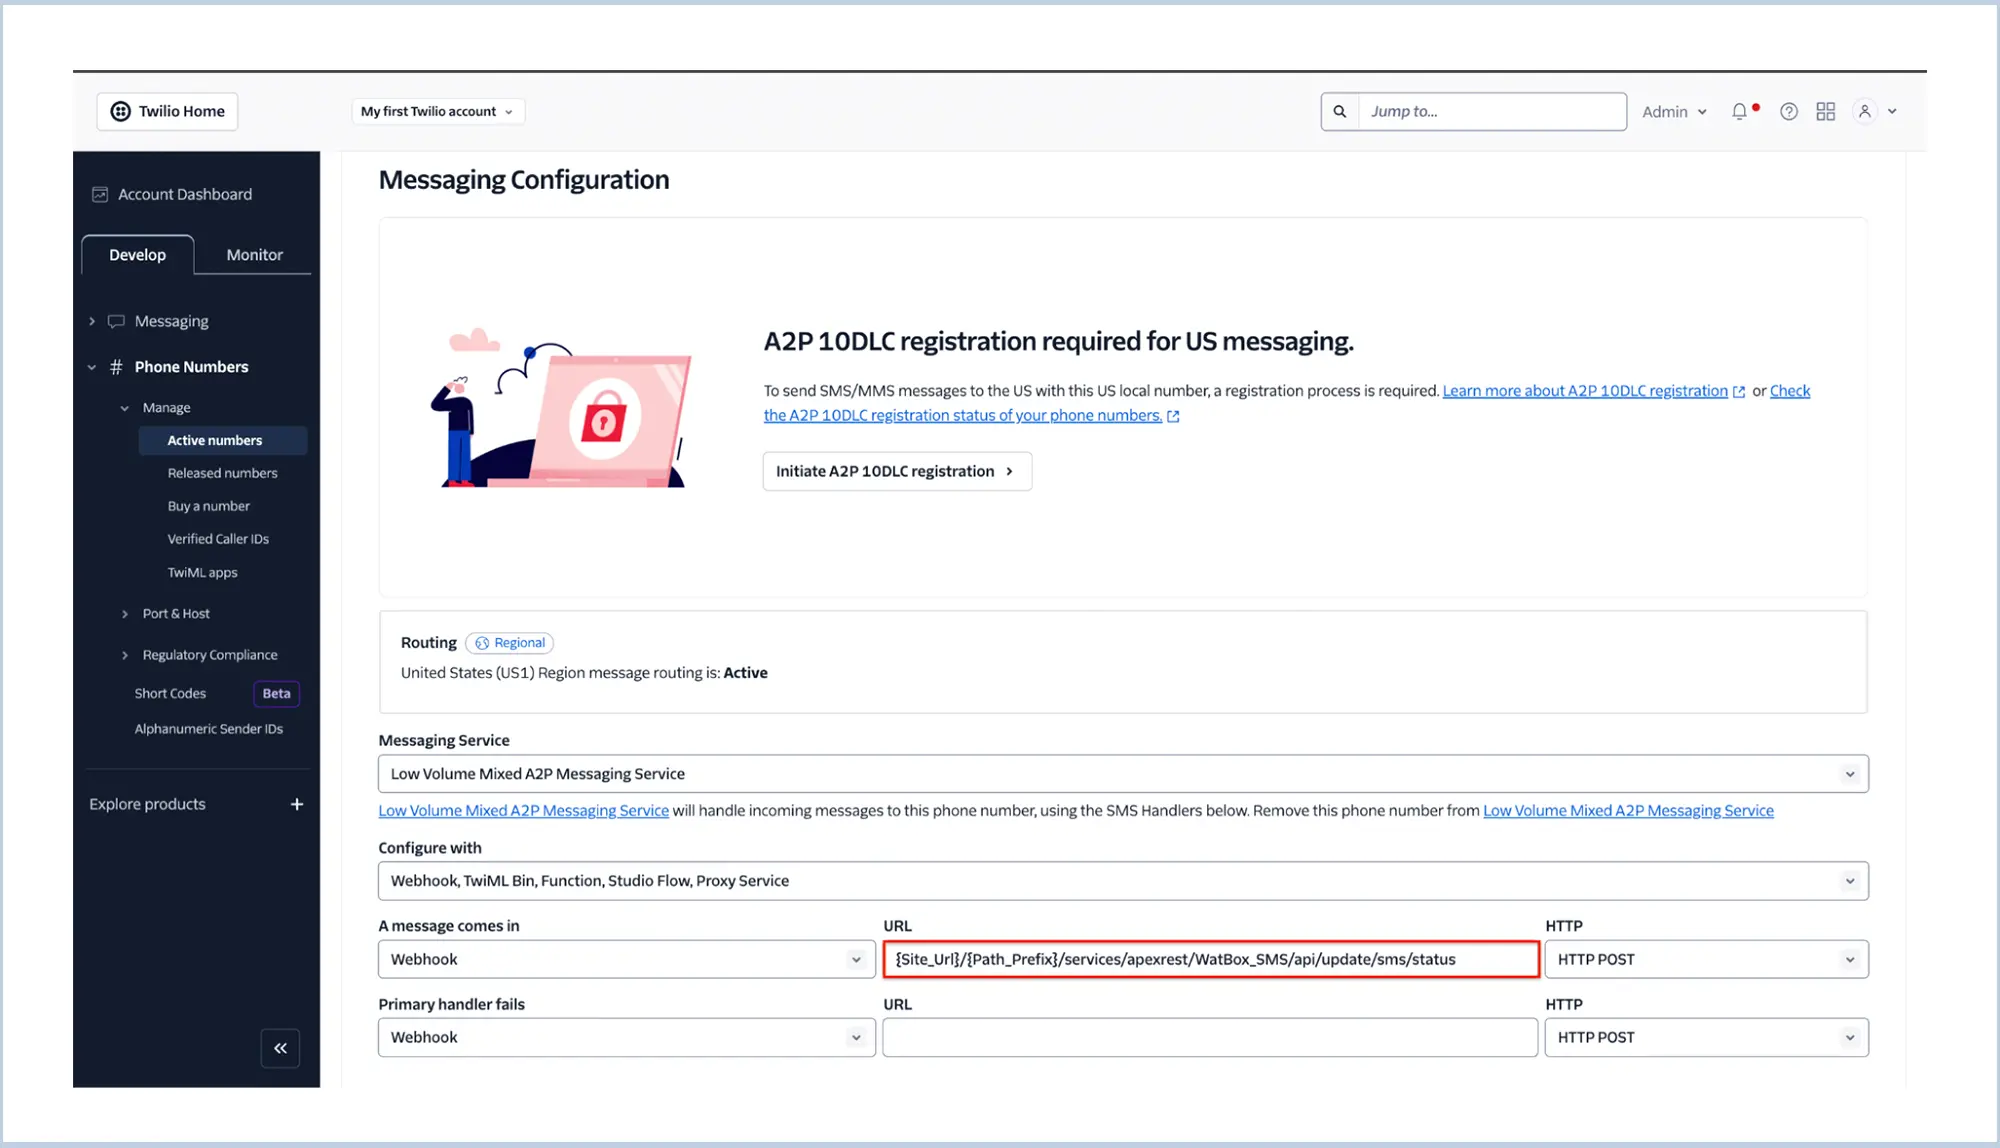
Update the SMSWebhookSite url in Twilio Account in order to receive incoming messages and status updates.
For Instance
-
{Site_Url}/{Path_Prefix}/services/apexrest/WatBox_SMS/api/update/sms/status
-
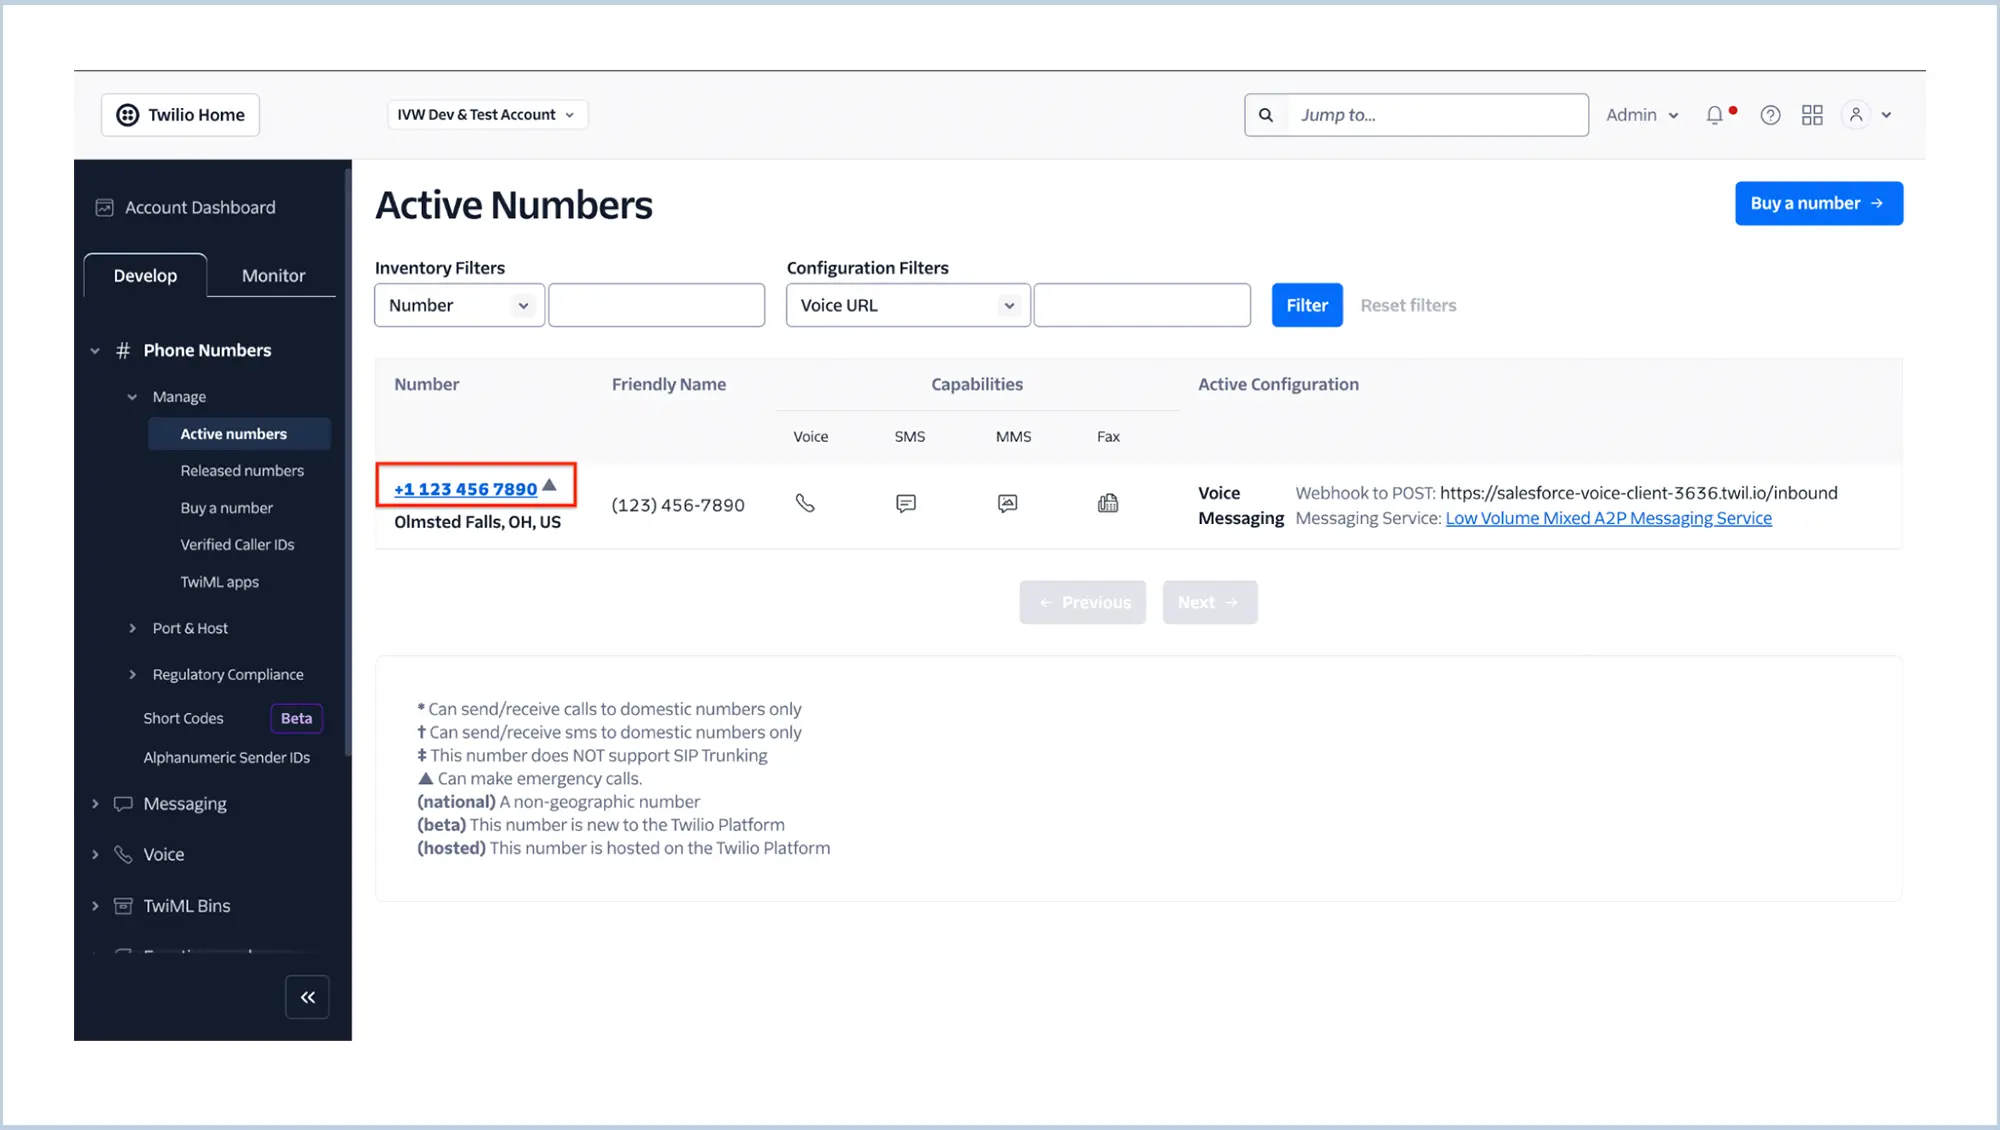
Go to - Develop -> Explore Products -> Super Network -> Phone Numbers -> Manage -> Active Numbers
-
Click the number -> Goto Configure Tab
-
Configure the url in the Url field of A message comes in under Messaging Configuration.

Post Deployment Step 4 :
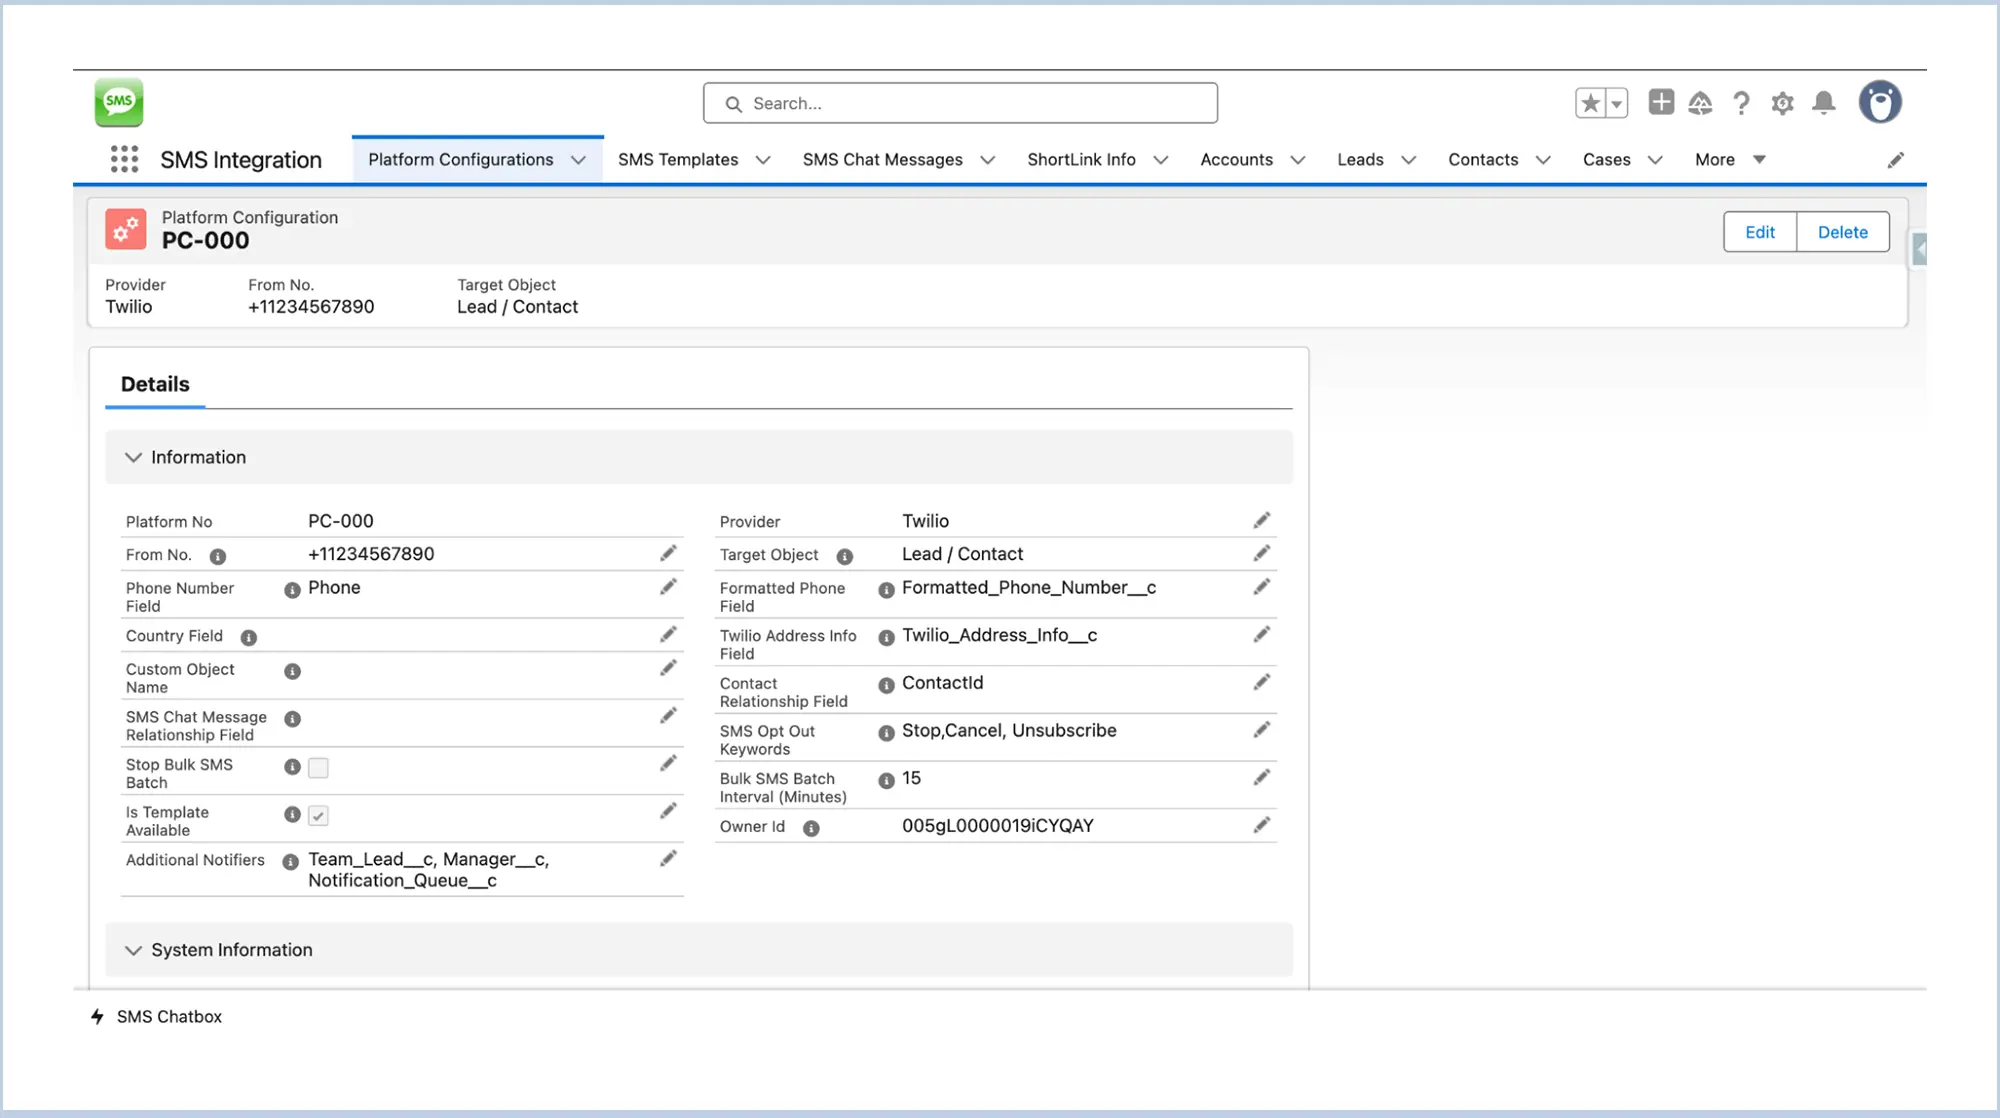
Create Platform Configuration record as following
| S.No | Field Name | Value |
|---|---|---|
| 1 | Provider | Twilio |
| 2 | From No. | Registered phone number with Twilio |
| 3 | Target Object | Account / Lead / Contact / Custom Object |
| 4 | Phone Number Field | API Name of the Targeted Phone Number field in the Target Object or the Phone Number field in the Contact object when the Target Object is Custom object and that doesn’t have a phone number field in it but has relationship with Contact. |
| 5 | Formatted Phone Field | API name of another phone field in the Target Object (Optional) |
| 6 | Country Field | Provide the API name of the field that stores the country information, only when the Target Object is a Custom Object.
|
| 7 | Twilio Address Info Field | Enter the API name of the field where the address information of new inbound messages will be stored.
|
| 8 | Custom Object Name | API Name of the Custom Object when the Target object is selected as Custom Object |
| 9 | Contact Relationship Field | API name of the field that establishes the relationship with the Target Object. If the Target Object is Lead or Contact, provide the API name of the Contact Relationship field on the Opportunity. If the Target Object is a Custom Object and it does not have a Phone Number field, enter the API name of the lookup field that links the Custom Object to the Contact. |
| 10 | SMS Chat Message Relationship Field | API name of the relationship field with the Custom Object in SMS Chat Messages object when the Target object is Custom object then create relationship field with that Custom Object in SMS Chat message and provide the name in it. |
| 11 | SMS Opt Out Keywords | Mention the keyword here like Stop, Cancel, Unsubscribe and Not Interested. When an Inbound received with a message mentioned here then that will be considered as SMS Opt out. For eg: Stop,Cancel,Unsubscribe,NotInterested |
| 12 | Stop Bulk SMS Batch | This will act as a switch to control the Bulk SMS Batch. If this checkbox is checked then Bulk SMS won’t work, all the schedule messages won’t get sent. |
| 13 | Bulk SMS Batch Interval | By default the Interval is set as 15 mins. It can be changed and need to schedule the batch according to this using the script provided in the doc below. |
| 14 | Is Template Available | Mark this checkbox when the SMS Templates are there. |
| 15 | OwnerId | Provide a user Id or a queue Id. That will be the owner of the new records which will get created when a new inbound received without matching with any records. |
| 16 | Additional Notifiers | Specify the API names of the fields used to send notifications for new inbound messages to users or queues other than the record owner.
|
NOTE : When the custom object itself has the Phone number field remember to create an SMS Opt Out field in that object. Make sure the API Name of the field is SMS_Opt_Out__c (Case-Sensitive).
Post Deployment Step 5 :
Update the Business Phone Number with the registered Phone number with Twilio and Enable SMS Bell Notification in the User to send outbound and to have bell notification for Inbound SMS.

Post Deployment Step 6 :
Assign Permission set to the user based on the access level
-
SMS Chatbox Admin - For Admin user
-
SMS Chatbox User - For all other users
-
SMS Chatbox User - For all other users
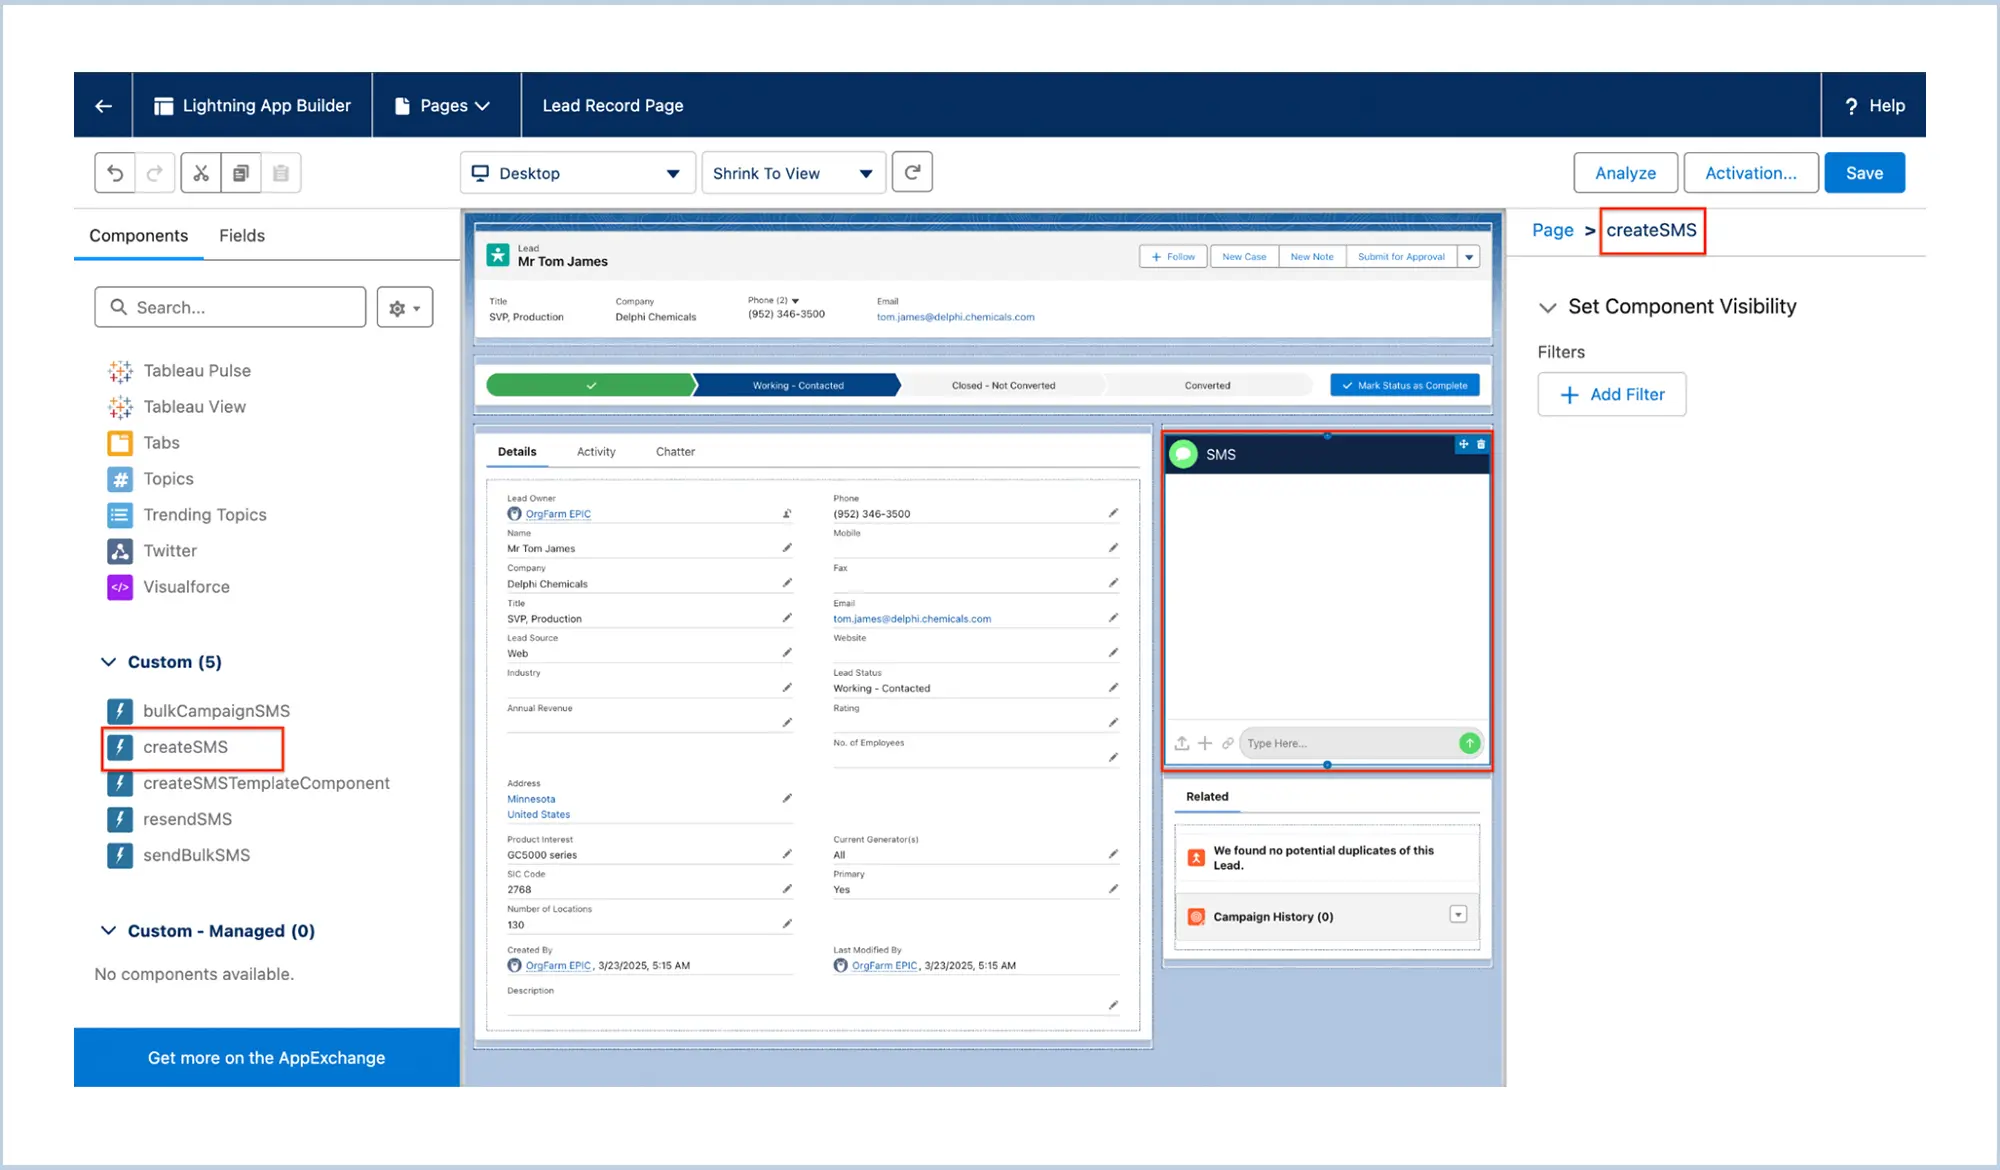
Post Deployment Step 7 :
To have the Component in Record Detail page place the CreateSMS custom component in the page.
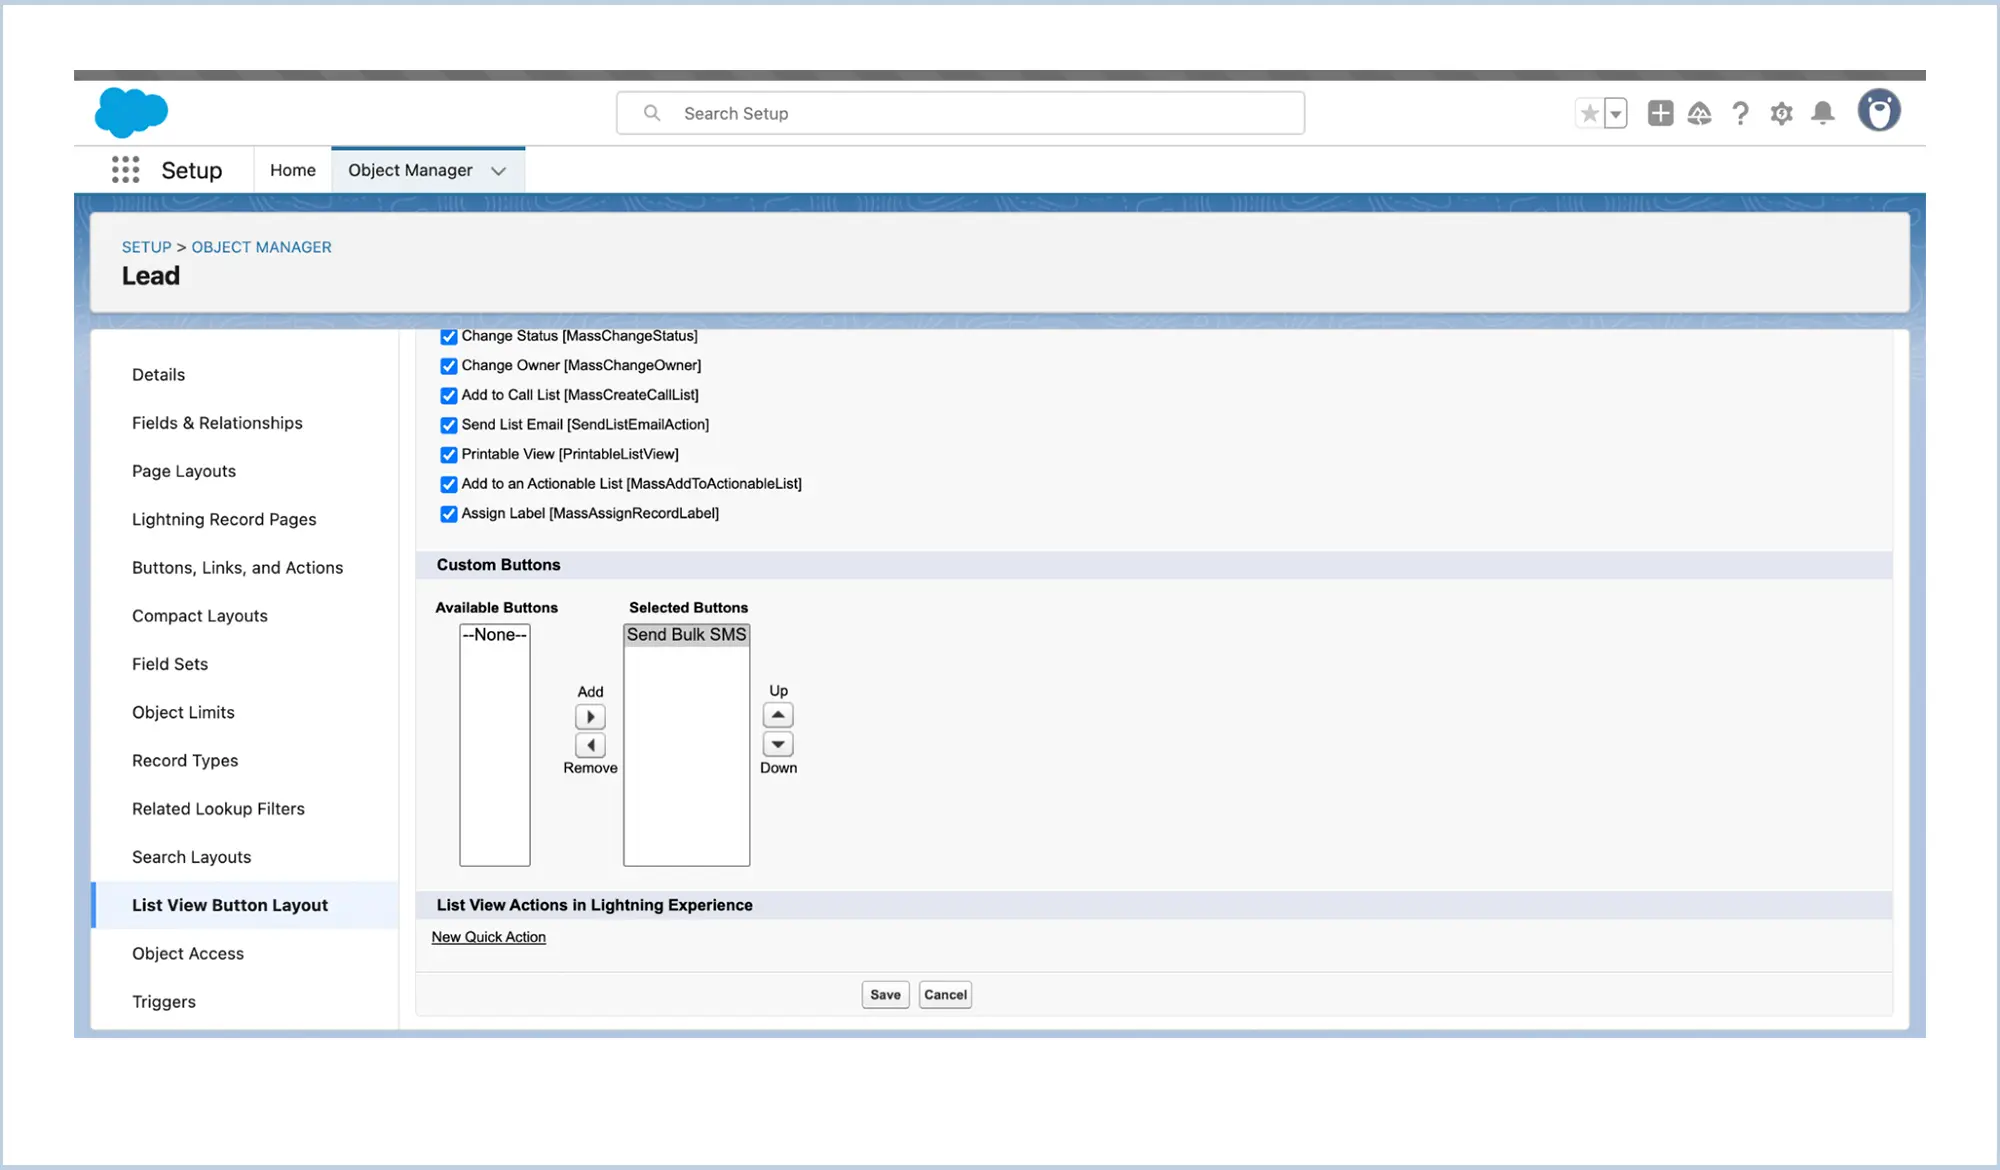
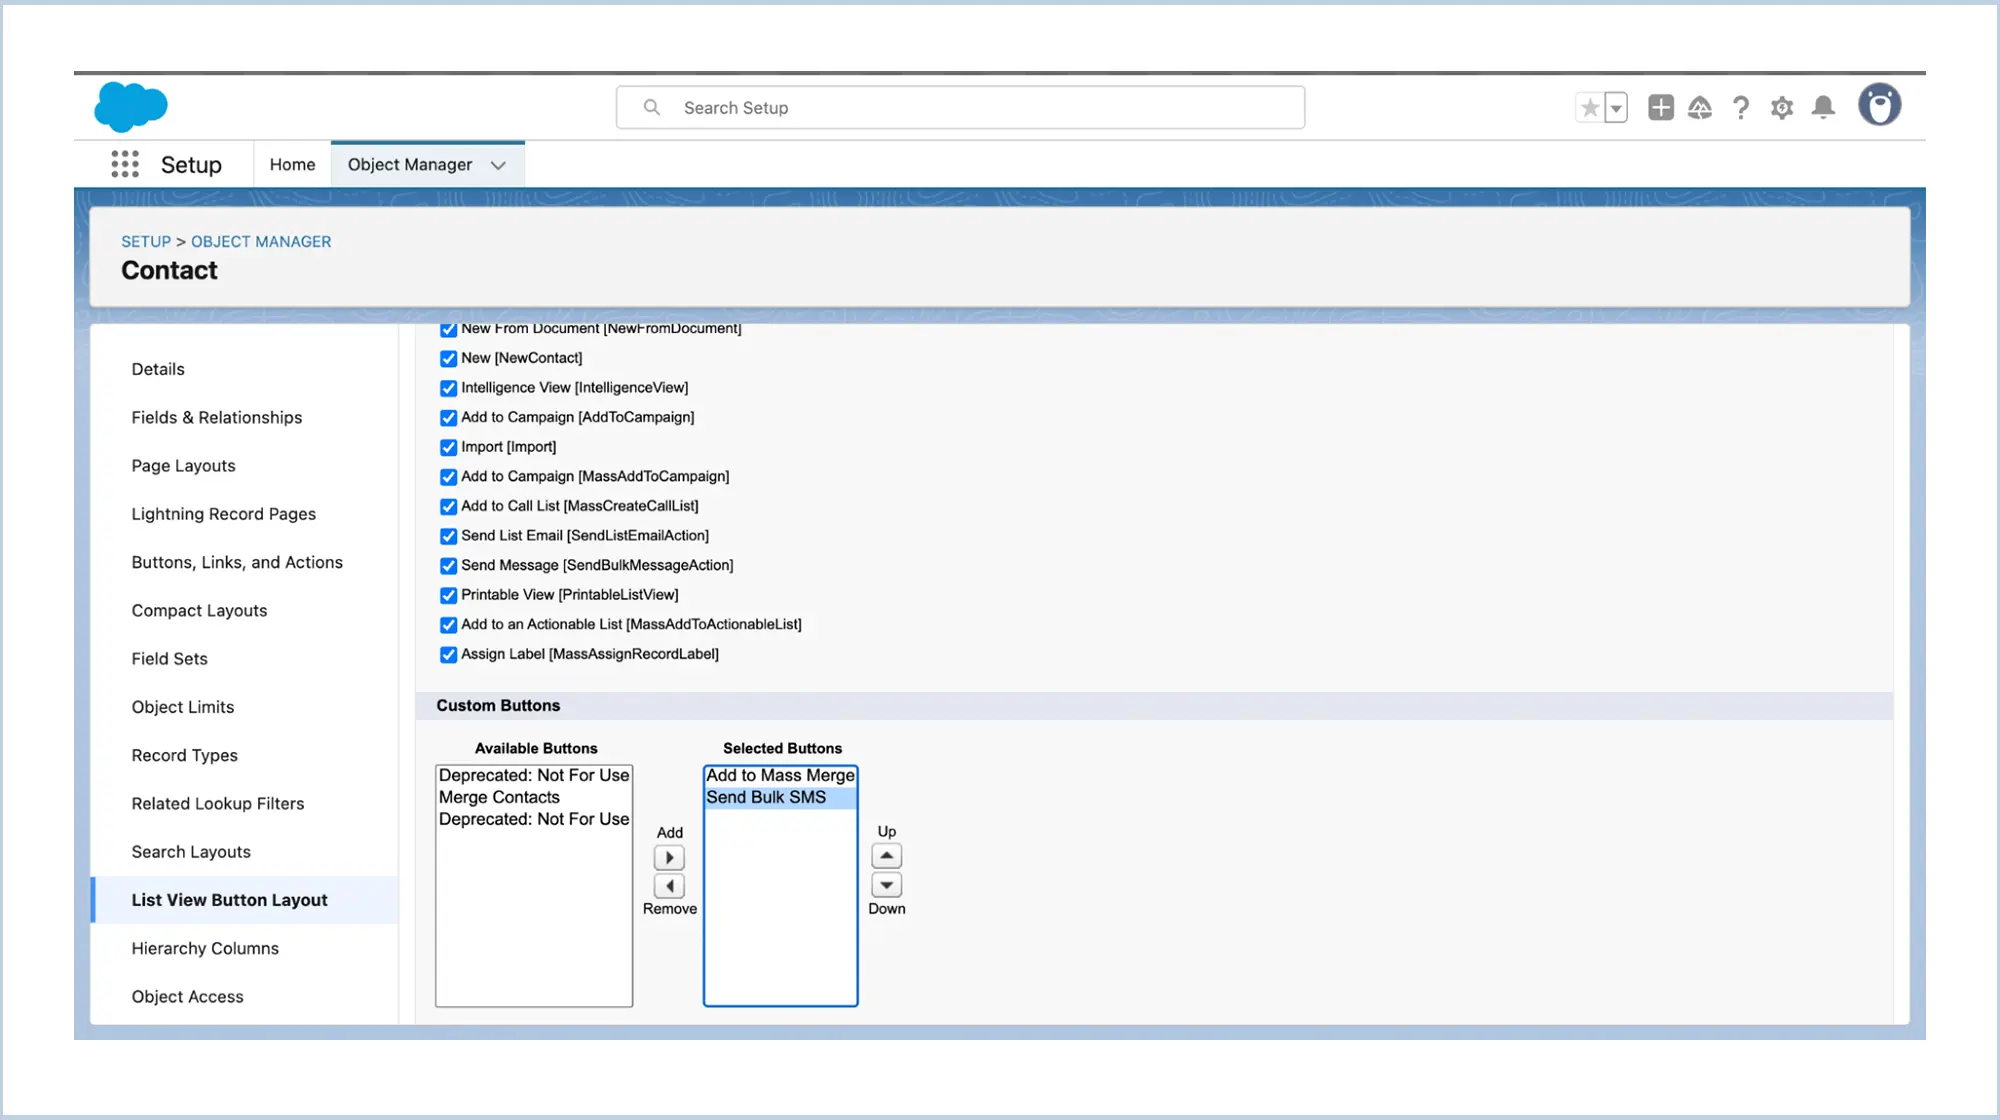
Post Deployment Step 8 :
To send bulk SMS to Leads and Contacts make sure that SMS templates exist for Lead and Contact objects. Include the Send Bulk SMS button in List view layout.
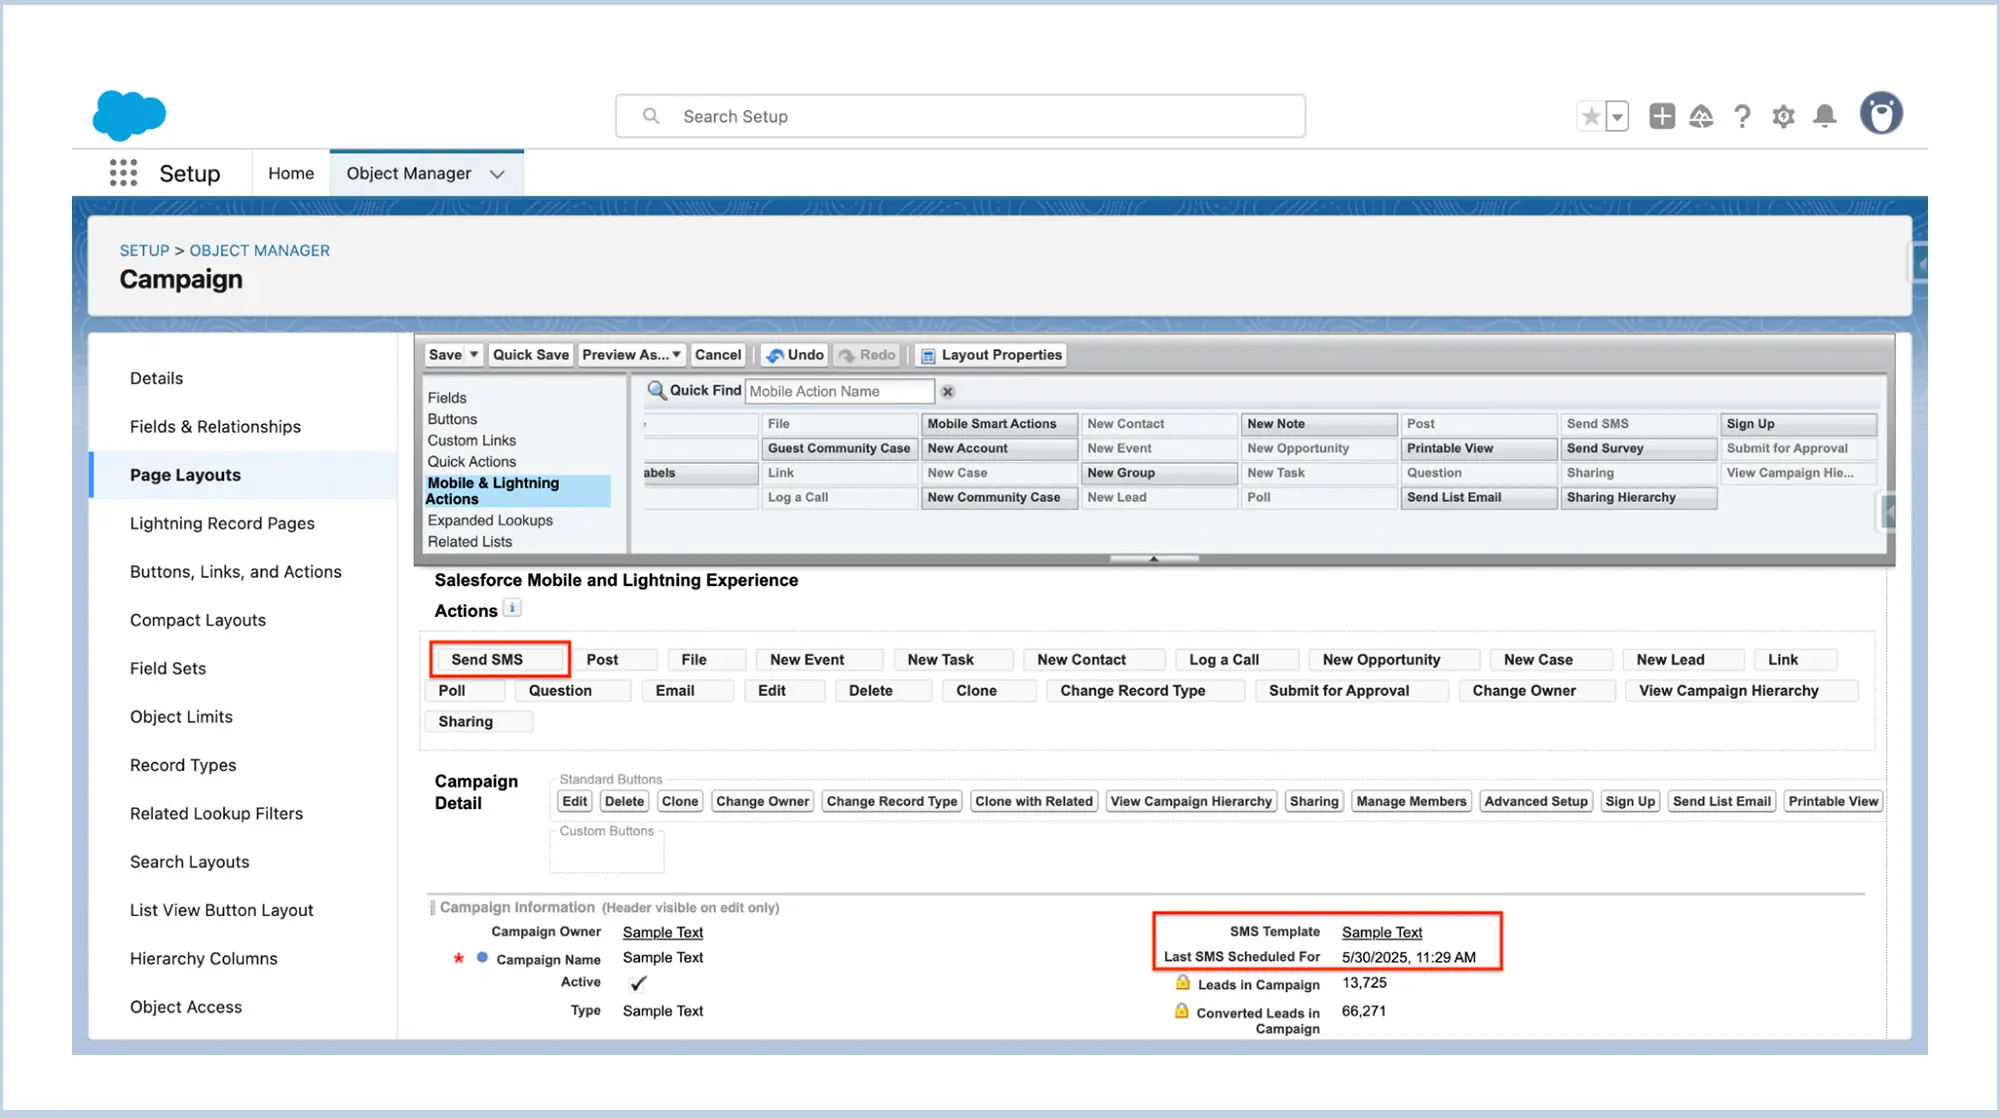
Post Deployment Step 9 :
To send SMS to the Campaign members make sure there are templates available for Campaign and that Campaign record is associated with an SMS Template. If the field is not in the record page then update the page by including the field in the page and include the Send SMS action button in the layout.
Post Deployment Step 10 :
To schedule the batch in every 15 mins interval execute the following script in the anonymous window.
-
Execute the below Apex script :
System.schedule('Watbox-SMS Job 1', '0 0 * * * ?', new WatBox_SMS.BulkSMSBatch());
System.schedule('Watbox-SMS Job 2', '0 15 * * * ?', new WatBox_SMS.BulkSMSBatch());
System.schedule('Watbox-SMS Job 3', '0 30 * * * ?', new WatBox_SMS.BulkSMSBatch());
System.schedule('Watbox-SMS Job 4', '0 45 * * * ?', new WatBox_SMS.BulkSMSBatch());
Setup for Community :
-
Go to Setup > Trusted URLs > New Trusted URL
-
Enter the domain URL in URL input text
-
Tick img-src and media-src checkboxes
-

-
Go to the builder page of the community portal and place the component on the respective record page
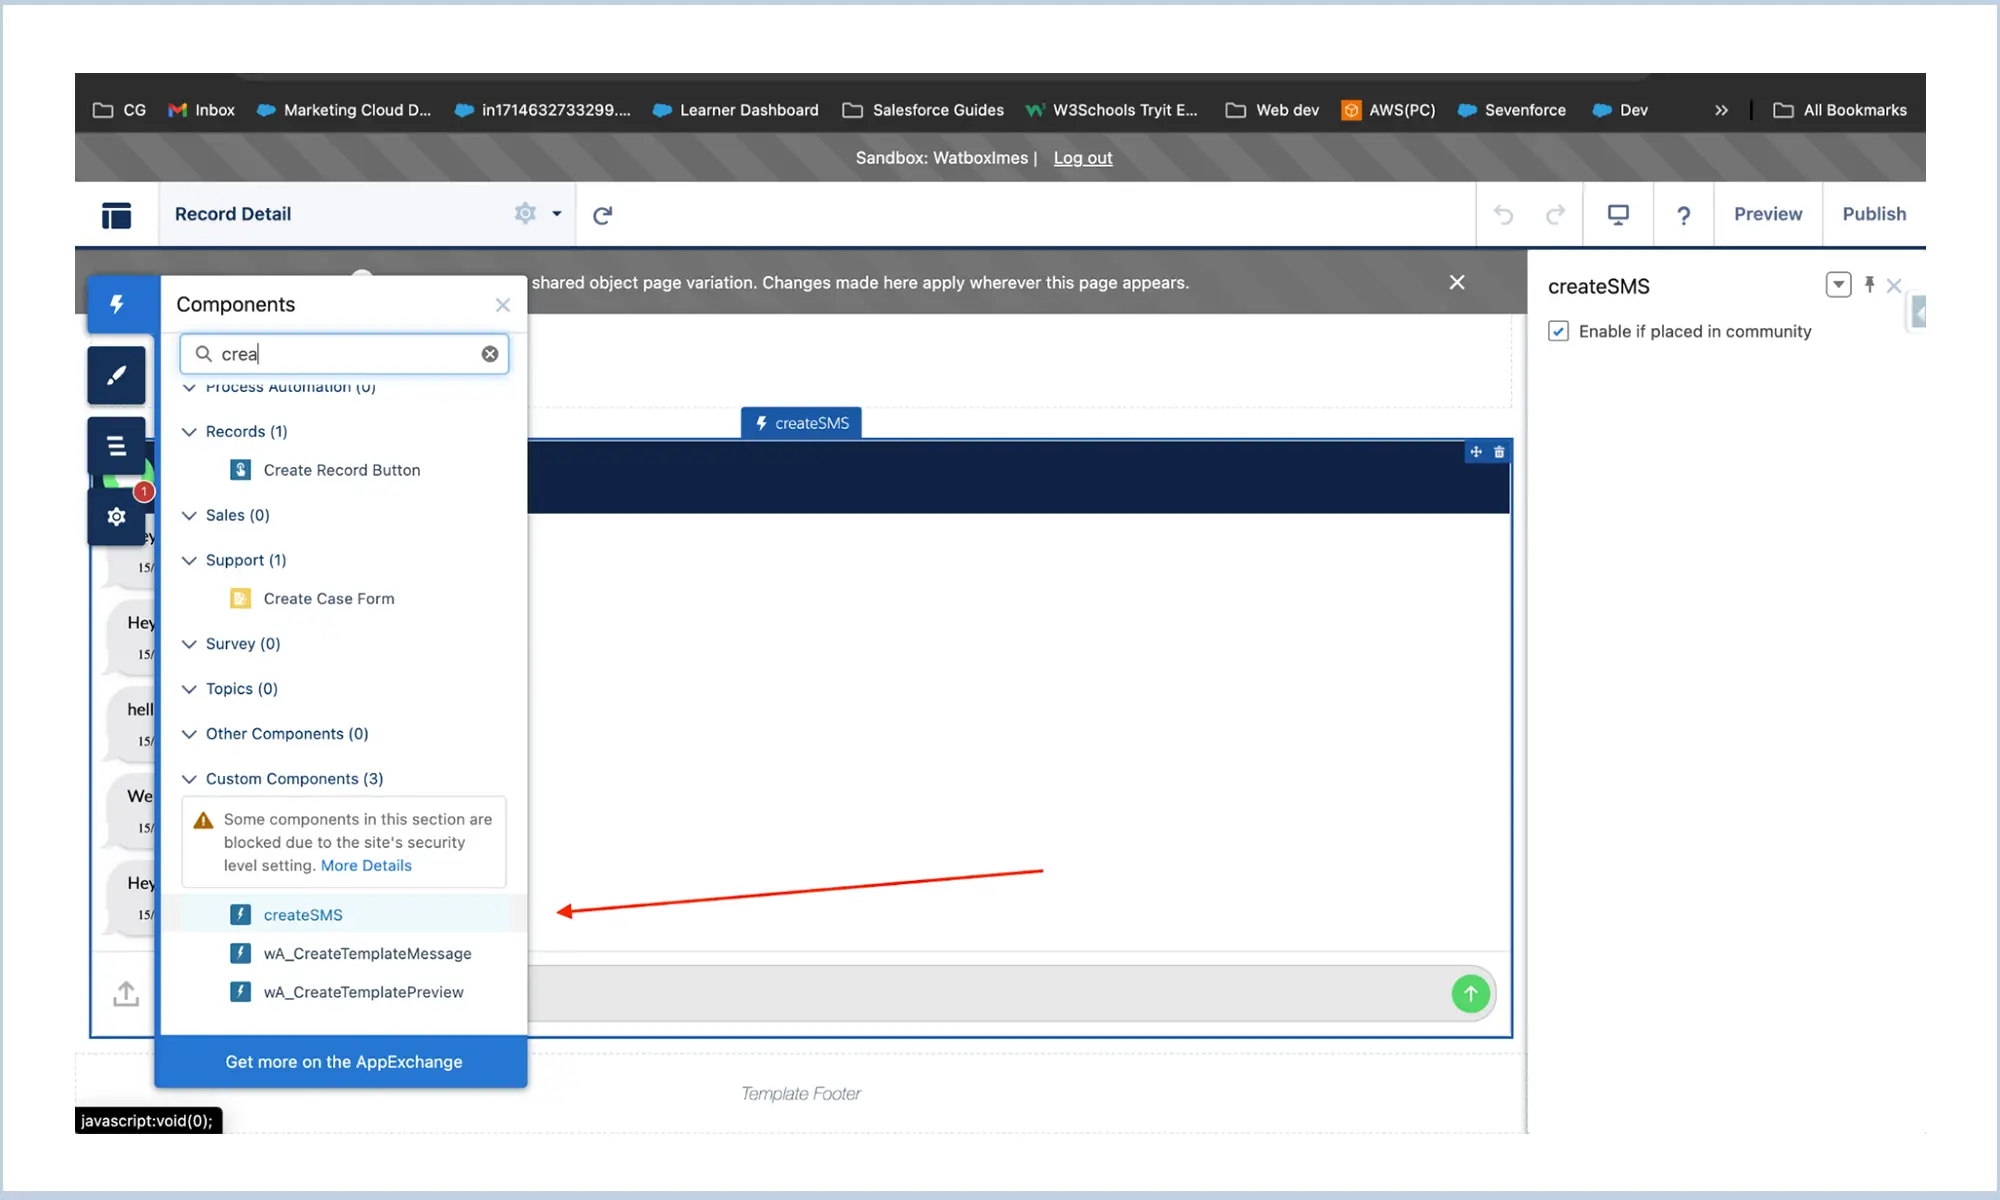
-
Tick the “Enable if placed in community checkbox” after placing the createSMS lightning web component.

Get in touch with us
Please fill out the quick form and we will be touch
with lightning speed.

Level up WhatsApp Integration with Salesforce
Start with a 15 day trial for you to taste the CRM + WhatsApp interactions!